Latest: Tutorials


Wednesday 19 February 2014

All Social Sharing Buttons Floating Widget for Blogger

2 comments
Choose your preferred style of social sharing buttons.
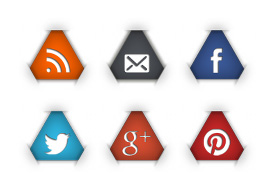
Blogging becomes interesting when people share your content on different social media sites and other websites with friends. In order to share your content on social media sites by visitors; you need to add some beautiful and smashing social sharing widgets. If your widget is looking attractive and catches people’s attention then your content might get shared by visitors. For this purpose, there has been a huge number of Blogger widgets and plugins by different designers. Today, I would like to share a floating social sharing widget with you which scrolls down automatically when visitors scroll down the page. You can see this widget on my blog. The same widget I’m sharing with you.

How to Add Social Media Floating Widget to Blogger?
The process of adding this widget to your blog is simplest. You need just to follow below steps:
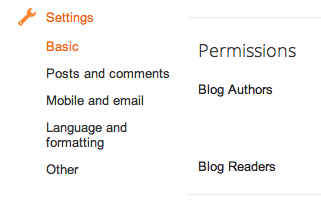
  • Blogger >> Template >> Edit HTML >> Jump to Blog1 >> Expand Var=’Post”
  • Search for below code by using CTRL+F Short Key
<b:includable id=’post’ var=’post’>
Just below/after above code paste the following code:
<b:if cond=’data:blog.pageType == &quot;item&quot;’>
<b:if cond=’data:blog.pageType != &quot;static_page&quot;’>
<style>
.mbt_social_floating{
position:fixed; bottom:10%; margin-left:-60px; float:left;
width:60px;
background-color:#f7f7f7;
padding: 5px 0 0px 0px;
border-top:1px solid #ddd;
border-left:1px solid #ddd;
border-bottom:1px solid #ddd;
z-index:9999px !important;
border-radius:5px;-moz-border-radius:5px;-webkit-border-radius:5px;
}
.mbt_social_floating .mbt_side_social_button{
margin-bottom:5px;
float:none;
height:auto;
width:60px;
}
.mbt_social_floating .st_twitter_vcount, .mbt_social_floating.st_plusone_vcount, .st_email{
margin-left:5px;
}
.mbt_social_floating .st_fblike_vcount{
margin-left:5px;
}
.mbt_social_floating .stButton_gradient{
background:none !important;
height:21px !important;
padding-left:0 !important;
}
.mbt_social_floating .chicklets, .mbt_social_floating .stMainServices {
background:url(&#39;https://blogger.googleusercontent.com/img/b/R29vZ2xl/AVvXsEj-Y8ciCbYjxSMhmacI2tEB4vA8MT33_JFYez1fOKOrTRh8kox1MLxc8JZqSidejvUOYm8AkN3xqaPndgFgSxssftK0PQ4ydTlrSmYdVcQ0IuqSG8dKI5r4fiJMiHGkTvBF1mh1GdUqgyrI/s400/gc_social_sprite.gif&#39;) no-repeat !important;
height:19px !important;
width:45px !important;
padding:0 !important;
}
.st_email .chicklets{
background-position:0 -77px !important;
background-image:url(&#39;https://blogger.googleusercontent.com/img/b/R29vZ2xl/AVvXsEj-Y8ciCbYjxSMhmacI2tEB4vA8MT33_JFYez1fOKOrTRh8kox1MLxc8JZqSidejvUOYm8AkN3xqaPndgFgSxssftK0PQ4ydTlrSmYdVcQ0IuqSG8dKI5r4fiJMiHGkTvBF1mh1GdUqgyrI/s400/gc_social_sprite.gif&#39;) !important;
}
.mbt_social_floating .st_twitter_vcount .st-twitter-counter{
background-position:0 -58px !important;
}
.mbt_social_floating .stButton_gradient{
border:none !important;
}
.mbt_social_floating .stBubble_count{
width:44px !important;
font-size: 15px !important;
font-weight: normal !important;
padding-top:7px !important;
height:23px !important;
background:none !important;
}
.mbt_social_floating .st_twitter_vcount .stBubble_count{
color:#00a6df;
background-color:#f8fbfc !important;
}
.st_fblike_vcount{
margin-bottom: 0px;
display: block;
}
.st_twitter_vcount{
margin-bottom: 3px;
display: block;
}
.st_email{
margin-bottom: 5px; margin-top: 3px;
display: block;
}
.mbt_social_floating .stBubble{
background-position: 21px 31px !important;
height:35px !important;
}
</style>
<div class=’mbt_social_floating’>
<script type=’text/javascript’>var switchTo5x=true;</script>
<script src=’http://w.sharethis.com/button/buttons.js’ type=’text/javascript’/>
<script type=’text/javascript’>stLight.options({onhover:false});</script>
<span class=’st_fblike_vcount’ displaytext=”/>
<span class=’st_twitter_vcount’ displaytext=” st_via=’oyejobiA‘/>
<div style=’margin:5px 0 0px 0;’>
<center><a class=’pin-it-button’ count-layout=’vertical’ expr:href=’&quot;http://pinterest.com/pin/create/button/?url=&quot; + data:post.url’>Pin It</a>
<a href=’javascript:void(run_pinmarklet())’ style=’margin-left:-46px; width:43px; height:20px; display:inline-block;’/>
<script src=’http://assets.pinterest.com/js/pinit.js’ type=’text/javascript’/>
<script type=’text/javascript’>
function run_pinmarklet() {
var e=document.createElement(&#39;script&#39;);
e.setAttribute(&#39;type&#39;,&#39;text/javascript&#39;);
e.setAttribute(&#39;charset&#39;,&#39;UTF-8&#39;);
e.setAttribute(&#39;src&#39;,&#39;http://assets.pinterest.com/js/pinmarklet.js?r=&#39; + Math.random()*99999999);
document.body.appendChild(e);
}
</script> </center>
</div>
<div style=’margin:0px 0 0 5px;’>
<span class=’st_plusone_vcount’ displaytext=”/>
</div>
<div class=’addthis_toolbox addthis_default_style ‘ style=’margin:5px 0px 5px 8px;’>
<a class=’addthis_counter’/>
</div>
<script src=’http://s7.addthis.com/js/250/addthis_widget.js’ type=’text/javascript’/>
<script type=’text/javascript’>
var addthis_config = {
ui_cobrand: &quot;MY BLOGGER TRICKS&quot;,
ui_header_color: &quot;#ffffff&quot;,
ui_header_background: &quot;#0080FF&quot;
}
</script>
<span class=’st_email’ displaytext=”/>
<p style=’ line-height:0px; font-size:10px; font-weight:bold; text-align:center;’><a href=’http://www.mybloggertricks.com/2012/05/create-floating-bar-for-pinterest-other.html’ style=’color:#CAC8C8;’>Widgets</a></p>
</div>
</b:if></b:if>
Save the template and just change the “OyejobiA” to your own Twitter user name. That’s all.
this widget will be displaying on the post pages not on home page, so just visit one of your posts to see the widget live on your blog.
 Note: This widget was originally shared by Mustafa of MyBloggerTricks.com, we are just re-sharing it with you.
Continue reading →

Move a blog between accounts

0 comments
Hey guys, how are you doing today? Just got something to discuss today.My today's post is how to move a blog between accounts

How to Move a blog between accounts
  1. Sign in to Blogger with Account 1, which we'll assume is the account containing the blog.
  2. Go to the "Permissions" section under Settings | Basic tab.
    Permissions section
  3. Click the Add Authors button and send an invitation to the owner of Account 2, the account to which you'd like to move the blog.
    Add authors
  4. Wait for the owner of Account 2 to accept the invitation. If you're sharing a computer, you'll need to sign out of Account 1 first, or each use a different browser.
  5. Once Account 2 has joined the blog, Account 1 can sign in again and go back to the Settings | Basic tab.
  6. Click the drop-down menu next to Account 2 and choose "Admin."
  7. Click the X next to Account 1 to remove Account 1.
If you have any questions, let me know using the comment box belowAdd as admin
Continue reading →

Add +1 and Delicious Sharing Count Buttons To Blogger Posts

0 comments
Wonderful tricks here, do you love this widget? if yes, then let me tell how you can install it to you blogger blog.
What could be more exciting then to have all major social networking buttons all together. social media widgetInternet is turning more and more social and social media networks help a lot in circulating content and in bringing handsome traffic. Google+ is the talk everywhere now and old bookmarking services like StumbleUpon and Delicious still remains important tools for ranking higher in search listings. I have combined the count buttons for +1, stumbleupon, twitter, Facebook, delicious and with a addthis button which includes 360 other social sharing options. In short the widget today offers all that a blog needs. Lets add it to blogger!

Add Social Networking Buttons at The Bottom of Posts

  1. Go To Blogger > Design > Edit HTML
  2. Backup your template
  3. Check the "Expand Widgets Template" box
  4. Search for this,
<data:post.body/>
5.    Just below it paste the following code,
<div style='clear: both;'/>
<b:if cond='data:blog.pageType == &quot;item&quot;'>
<div align='left'>
<p style='margin:0; border-bottom:1px solid #666666;'><font color='#666666' face='Arial Black' size='5'>Kindly Share The Love &#187;&#187;</font></p>
<table border='0' cellpadding='2' cellspacing='10'><tbody>
    <tr>
<td style='padding-top:8px;'>
<g:plusone size='tall'/>
<script type='text/javascript'>
  (function() {
    var po = document.createElement(&#39;script&#39;); po.type = &#39;text/javascript&#39;; po.async = true;
    po.src = &#39;https://apis.google.com/js/plusone.js&#39;;
    var s = document.getElementsByTagName(&#39;script&#39;)[0]; s.parentNode.insertBefore(po, s);
  })();
</script>
</td>
      <td style='padding-top:8px; '>    <script src='http://www.stumbleupon.com/hostedbadge.php?s=5'/>
</td>
      <td style='padding-top:8px;'>   <div id='fb-root'/><script src='http://connect.facebook.net/en_US/all.js#xfbml=1'/><fb:like font='' href='' layout='box_count' send='false' show_faces='false'/></td>
      <td style='padding-top:8px;'><a class='twitter-share-button' data-count='vertical' href='http://twitter.com/share'>Tweet</a><script src='http://platform.twitter.com/widgets.js' type='text/javascript'/> </td>
<td>
<script src='http://ajax.googleapis.com/ajax/libs/jquery/1.3.2/jquery.min.js' type='text/javascript'/>
<script src='http://delicious-button.googlecode.com/files/jquery.delicious-button-1.0.min.js' type='text/javascript'/>
<a class='delicious-button' href='http://delicious.com/save'>
   &lt;!-- {
      url:&quot;<data:post.url/>&quot;
      ,title:&quot;<data:post.title/>&quot;
     
   } --&gt;
   Save on Delicious
</a>
</td>
      <td>
<!-- AddThis Button BEGIN -->
<div class='addthis_toolbox addthis_default_style '>
<a class='addthis_counter'/>
</div>
<script src='http://s7.addthis.com/js/250/addthis_widget.js' type='text/javascript'/>
<!-- AddThis Button END -->
</td>
    </tr>
  </tbody></table></div></b:if>

<div style='clear: both;'/>

If you wish to change the colour of the bolded black text then simply change this #666666
with a hexadecimal colour code of your choice.
    6.  Save your template and you are all done!
If you have any queries/ problem, let me know in the comment box below
Continue reading →

How to create a free Privacy policy for your blog?

0 comments
privacy policy for website
Recent time now,Privacy policy is very necessary for websites, because it lets the users know that how you use their personal information while they are visiting your website. In privacy policy a website owner actually states about all the information which is collected from users' browsers, computers and the cookies which are created during their visit. The users actually don't know whether their data is being recorded by the website. But it is good practice to add a privacy policy page to your website's home page and state all the necessary information. This way, no one can claim anything against you. Moreover, if you are using Google Adsense on your website then privacy policy page is must in order to keep your account in good standing. Now let's have a look at the resources.

Definition of a Privacy Policy.
Privacy means the personal data/information of the people, and policy means a declaration. So privacy policy is for the people who visit your website, you can easily tell them in your privacy page that how you use their personal information. You just need to state in the privacy page that what kind of information you'll save from the user's browser and computer. And also if you're using advertisements on your website then you should state about them as well.
#1. http://www.generateprivacypolicy.com

This is a privacy policy generator which you can easily use to create your Policy page. Go to the website, create an account and generate your policy page, and finally copy the text and paste into a blank page which you want to publish as a privacy page on your website.
#2. http://www.freeprivacypolicy.com
This is another great policy generator website which is absolutely free to use and easy to handle. Just go there and create your policy page with 3 steps. You can copy the generated policy and paste into the page you want to publish as a privacy page. That's easy as 1,2,3. 
#3. Free Privacy Policy Samples
By clicking above link you can find a sample for free privacy policy, just visit the link and copy the policy from that page, and insert that into the page you want to publish as your policy page. That's the most simple one. You can change anything you like, and that also doesn't matter. 

#4. Now the Final Tip

If you are facing any problems with above resources then the most easiest thing to do is; just visit my this blog's privacy page, copy all the page, and create a new page on your website/blog and paste it to that page, and then publish. Just change my website address to yours at the beginning.
Note: You must add a rel="noindex" attribute to your privacy page, because this page is not for search engines, it is only for the visitors who visit your site, therefore you must add a noindex attribute to hide it from search engines. If you don't add noindex attribute then it may also create copyright or duplicate content issues, because thousands of webmasters use the same page.
Do you have any queries/question? Just let me know in the comment box below
Continue reading →

Bcome a Creative Blogger in no steps

0 comments


Become a Creative Blogger to Get Succeed

The most common way to share your ideas, knowledge and to make some handsome income is blogging in today’s online world. But many of the newbies bloggers suffer when they actually start writing. They don't know from where to start and how to turn every single visitor into a reader and drive consistent traffic. Today I am going to share some tips to be a creative & successful blogger which will definitely help you to get started.

Rough Idea: 

To help generate more ideas while you start writing you should leave a rough fingerprint in your brain about what you are going to write, it may be a hot topic in the world or just a story.

Think Out of Box: 

Thinking out of the box will adds a surprise element in your article because the idea is directly coming from your mind, fresh & untouched. So, Always try to think out of the box which others may not think.

Make the Reader to Say WOW: 

Well you want to make your reader to say WOW.... :P Writing text without any formatting and un-meaningful title won't help. So, you need to pick up a nice meaningful title normally limited to 60 to 70 characters and do some nice formatting, highlight the main points, make it easy to read and there you go to attract the visitors who can’t just stop saying WoW...!. So, being a creative blogger you need to attract the readers to read it.

Use Pictures in Posts: 

This is Psychological fact that humans remember the visual things more than the text read. So, adding images which gives a short summary of your post will enhance the readers’ interest. 
A Picture is Worth Thousand Words

Imagination: 

Imagination is more important than knowledge. So, you can do more. The writing will never end. Imagination will not only enhance the current post but will help you generate more ideas for other posts. Imagine what else you can do, what more useful things you can add in your posts.

Think like a Reader: 

Remember the point "Imagination". While writing always thinks how a reader will be reading your post. If you are getting bored, the reader will also get bored. If an idea which comes in your mind is off-topic you can still make it useful for others. So user will not be bored while reading your article. Never test the patience of the reader. If a reader gets frustrated with unwanted things he will not read further.
Continue reading →

How to Block out Negative Comments In Your Blog?

0 comments

Are you a blogger? Do you want to grow in your blogging skills then if that is the case you have to face some negatives comment on you blog.For example a friend once told me that he rarely get negative comments on his blog.That shows his blogging skills are yet to improve.Anyway today's post is how to mange negatives comments without making you drown on stress.

Encouraging Discussion:

Just consider your blog comment section only have "great post", "nice article", "good attempt" etc. Is it not make your blog post boring? Definitely Yes. So Whats encourages discussions among the readership, "Negative Comments" which makes your post live. I always allow negative comments on my blog because i know their will be two commenting parties one will be in favour and other will be against which will share thier views. So Negative Comments actually an real method to drive traffic on your blog. 

Your Readers Will Never Leave Your Site:

Now i am going to share my own example  I,ve had commentators who post that my site is worst and they are going to leave my site and will never come back but after some day they are accusing me again on another post. So What does i actually want to say is nobody can completely left a site . they may not visit your site for a while but its rare for someone to never back.

How to Handle a Negative Comment:

Best way to handle a negative comment is to thank commentator.Yeah thats really the best way.I once read a book that quotes '' Those who takes time to thank people dont have pains in their heart''. Just show gratitude no matter what they comment. Tats makes you fit and strong and eventhough improve your blogging skills.
Continue reading →

Add Beautiful Scrolling Recent Posts Widget for Blogger

0 comments

 One thing i know is you can make your blog professional designed if you do everything mentioned in this blog.

Blogger.com is an easy platform for creating free blogs and making them stunning. Actually, now you can stylize your blog with tons of free widgets by different \designers.If you have been following me lately then you would have find the best design for your blog.

Today's post is How to add beautiful scrolling recent posts widget for your blog.

Now let's start adding this beautiful widget to your blogger blogs..

  • Go to Blogger Dashboard 
  • Now Template >> HTML >> Proceed 
  • And find <head> tag inside your template by using CTRL+F
  • Right after <head> tag insert following jQuery link
<script src='http://ajax.googleapis.com/ajax/libs/jquery/1.4.2/jquery.min.js' type='text/javascript'></script>

Save your template And you're done...

Adding the widget to blogger

Now after adding the JavaScript library into your blog's HTML section, do the following to add this cute widget into your blog:

  • Go to Blogger >> Layout >> Add Gadget >> Select an HTML/JavaScript Gadget
  • Copy the following code and paste inside an HTML/JavaScript widget
<style type="text/css" media="screen">
<!--
/* ========== Scrolling Recent Posts Widget By helperblogger.com ======== */
#helperblogger-widget {
    overflow: hidden;
    margin-top: 5px;
    padding: 0px 0px;
    height: 385px;
}
#helperblogger-widget ul {
    width: 295px;
    overflow: hidden;
    list-style-type: none;
    padding: 0px 0px;
    margin: 0px 0px;
}
#helperblogger-widget li {
    width: 282px;
    padding: 5px 5px;
    margin: 0px 0px 5px 0px;
    list-style-type: none;
    float: none;
    height: 80px;
    overflow: hidden;
    background: #fff url(https://blogger.googleusercontent.com/img/b/R29vZ2xl/AVvXsEikFupZgFjhsb_Gz64lGJtsEqqLhoxp-lAB7Pz6RFryCqyocaV6xJvfs-QRxxeCyRy7bgvldDA7YdJYmp1CyZBziKHFrNNFGZDXfhwt-AtpWF4Z9uYzJLZ8bhMkr1FjLBQGOphyioOOWuE/s1600/helperblogger.com-post.jpg) repeat-x;
    border: 1px solid #ddd;
}
#helperblogger-widget li a {
    text-decoration: none;
    color: #4B545B;
    font-size: 15px;
    height: 18px;
    overflow: hidden;
    margin: 0px 0px;
    padding: 0px 0px 2px 0px;
}
#helperblogger-widget img {
    float: left;
    margin-top: 10px;
    margin-right: 15px;
    background: #EFEFEF;
    border: 0;
}
#helperblogger-widget img {
    -webkit-transition: all 0.5s ease;
    -moz-transition: all 0.5s ease;
    transition: all 0.5s ease;
    padding: 4px;
    background: #eee;
    background: -webkit-gradient(linear, left top, left bottom, from(#eee), color-stop(0.5, #ddd), color-stop(0.5, #c0c0c0), to(#aaa));
    background: -moz-linear-gradient(top, #eee, #ddd 50%, #c0c0c0 50%, #aaa);
    -webkit-border-radius: 4px;
    -moz-border-radius: 4px;
    border-radius: 4px;
    -webkit-box-shadow: 0 0 3px rgba(0,0,0,.7);
    -moz-box-shadow: 0 0 3px rgba(0,0,0,.7);
    box-shadow: 0 0 3px rgba(0,0,0,.7);
}
#helperblogger-widget img:hover {
    -moz-transform: scale(1.2) rotate(-350deg);
    -webkit-transform: scale(1.2) rotate(-350deg);
    -o-transform: scale(1.2) rotate(-350deg);
    -ms-transform: scale(1.2) rotate(-350deg);
    transform: scale(1.2) rotate(-350deg);
    -webkit-box-shadow: 0 0 20px rgba(255,0,0,.4), inset 0 0 20px rgba(255,255,255,1);
    -moz-box-shadow: 0 0 20px rgba(255,0,0,.4), inset 0 0 20px rgba(255,255,255,1);
    box-shadow: 0 0 20px rgba(255,0,0,.4), inset 0 0 20px rgba(255,255,255,1);
}
.spydate {
    overflow: hidden;
    font-size: 10px;
    color: #0284C2;
    padding: 2px 0px;
    margin: 1px 0px 0px 0px;
    height: 15px;
    font-family: Tahoma,Arial,verdana, sans-serif;
}
.spycomment {
    overflow: hidden;
    font-family: Tahoma,Arial,verdana, sans-serif;
    font-size: 10px;
    color: #262B2F;
    padding: 0px 0px;
    margin: 0px 0px;
}
/* ========== Scrolling Recent Posts Widget By helperblogger.com ======== */
-->
</style>
<script language='JavaScript'>
imgr = new Array();
imgr[0] = "https://blogger.googleusercontent.com/img/b/R29vZ2xl/AVvXsEhU62N5-u9YtXS1-5ZFCSui7XQ7kxnC3oZx2zXbvv5oajW5IqA4hwrEnIg3fwAyeBBbnJhKnr1kFzIu3zQQAbd4kumkcObiG0fHzeEABIVSUIvfvJ_F21JFRaCOmRfq-kI0SlWaTTlXfi4/s1600/no-thumbnail.png";
imgr[1] = "https://blogger.googleusercontent.com/img/b/R29vZ2xl/AVvXsEhU62N5-u9YtXS1-5ZFCSui7XQ7kxnC3oZx2zXbvv5oajW5IqA4hwrEnIg3fwAyeBBbnJhKnr1kFzIu3zQQAbd4kumkcObiG0fHzeEABIVSUIvfvJ_F21JFRaCOmRfq-kI0SlWaTTlXfi4/s1600/no-thumbnail.png";
imgr[2] = "https://blogger.googleusercontent.com/img/b/R29vZ2xl/AVvXsEhU62N5-u9YtXS1-5ZFCSui7XQ7kxnC3oZx2zXbvv5oajW5IqA4hwrEnIg3fwAyeBBbnJhKnr1kFzIu3zQQAbd4kumkcObiG0fHzeEABIVSUIvfvJ_F21JFRaCOmRfq-kI0SlWaTTlXfi4/s1600/no-thumbnail.png";
imgr[3] = "https://blogger.googleusercontent.com/img/b/R29vZ2xl/AVvXsEhU62N5-u9YtXS1-5ZFCSui7XQ7kxnC3oZx2zXbvv5oajW5IqA4hwrEnIg3fwAyeBBbnJhKnr1kFzIu3zQQAbd4kumkcObiG0fHzeEABIVSUIvfvJ_F21JFRaCOmRfq-kI0SlWaTTlXfi4/s1600/no-thumbnail.png";
imgr[4] = "https://blogger.googleusercontent.com/img/b/R29vZ2xl/AVvXsEhU62N5-u9YtXS1-5ZFCSui7XQ7kxnC3oZx2zXbvv5oajW5IqA4hwrEnIg3fwAyeBBbnJhKnr1kFzIu3zQQAbd4kumkcObiG0fHzeEABIVSUIvfvJ_F21JFRaCOmRfq-kI0SlWaTTlXfi4/s1600/no-thumbnail.png";
showRandomImg = true;
boxwidth = 255;
cellspacing = 6;
borderColor = "#232c35";
bgTD = "#000000";
thumbwidth = 50;
thumbheight = 50;
fntsize = 15;
acolor = "#666";
aBold = true;
icon = " ";
text = "comments";
showPostDate = true;
summaryPost = 40;
summaryFontsize = 10;
summaryColor = "#666";
icon2 = " ";
numposts = 10;
home_page = "http://www.noblenaijablog.blogspot.com/";
limitspy=4;
intervalspy=4000;
</script>
<div id="helperblogger-widget">
<script src='http://code.helperblogger.com/recent-posts-spy.js' type='text/javascript'></script>
</div>
 Just replace the URL "http://www.noblenaijablog.blogspot.com" with your own blog address and save the widget. That's all done. And now view your blog with a new stylish addition.  Enjoy!
Continue reading →

Show Next & Previous Post Titles in Blogger with jQuery Navigation

0 comments
My tutorial today is going to be trickish but easy if you do the right steps.You do see in your blogger blog Newer or older post.For me is not my fancy thats why i brought to you the real jQuery widget for the post older and newer.

Next Previous buttons
First we will add the necessary code for the new pagination and then we will remove the existing default buttons that appear below comment section
  1. Go To Blogger > Template
  2. Backup your template
  3. Click "Edit HTML"
  4. Search for ]]></b:skin>

/*################MBT Pager ##########################*/
.mbt-pager { border-top: 2px dashed #ddd; border-bottom: 2px dashed #ddd;  margin-bottom: 10px;   overflow:hidden; padding:0px;}
.mbt-pager li.next { float: right; padding:0px; background:none; margin:0px;}
.mbt-pager li.next a { padding-left: 24px; }
.mbt-pager li.previous { margin:0px -2px 0px 0px; float: left;  border-right:1px solid #ddd; padding:0px; background:none;
}
.mbt-pager li.previous a { padding-right: 24px;  }
.mbt-pager li.next:hover, .mbt-pager li.previous:hover  {background:#333333; }
.mbt-pager li { width: 50%; display: inline; float: left; text-align: center; }
.mbt-pager li a { position: relative; min-height: 77px; display: block; padding: 15px 46px 15px; outline:none; text-decoration:none;}
.mbt-pager li i { color: #ccc; font-size: 18px; }
.mbt-pager li a strong { display: block; font-size: 20px; color: #ccc; letter-spacing: 0.5px; font-weight: bold; text-transform: uppercase; font-family:oswald, sans-serif, arial; margin-bottom:10px;}
.mbt-pager li a span { font-size: 15px; color: #666;  font-family:oswald,Helvetica, arial; margin:0px;}
.mbt-pager li a:hover span,
.mbt-pager li a:hover i { color: #ffffff; }
.mbt-pager li.previous i { float:left; margin-top:15%; margin-left:5%; }
.mbt-pager li.next i { float: right;
margin-top: 15%;
margin-right: 5%; }
.mbt-pager li.next i, .mbt-pager li.previous i ,
.mbt-pager li.next,  .mbt-pager li.previous{
-webkit-transition-property: background color; -webkit-transition-duration: 0.4s; -webkit-transition-timing-function: ease-out;
-moz-transition-property: background color; -moz-transition-duration: 0.4s; -moz-transition-timing-function: ease-out;
-o-transition-property: background color; -o-transition-duration: 0.4s; -o-transition-timing-function: ease-out;
transition-property: background color; transition-duration: 0.4s; transition-timing-function: ease-out; }
.fa-chevron-right {padding-right:0px;}

.fa-chevron-right {padding-right:0px;}
  • To change the black background and white font color of the selected area on mouse hover edit: background:#333333;    and for font color edit: color: #ffffff;
  • Use  Color generator tool for picking the hexadecimal color code from mybloggertricks.com
5. Now we will add some fancy Google web font called Oswald, so that our widget stands out. Kindly search for <head> and just below it paste the following code:
<script src='http://ajax.googleapis.com/ajax/libs/jquery/1/jquery.min.js' type='text/javascript'/>
<link href='http://fonts.googleapis.com/css?family=Oswald' rel='stylesheet' type='text/css'/>
Note: Remove the bolded code if you have already added jquery library inside your template.
     6. Next we will add the HTML code that will position the pager at the bottom of last paragraph on the blog post. Search for <data:post.body/>
     7. Just below it paste the following HTML code:
<b:if cond='data:blog.pageType == &quot;item&quot;'>
<b:if cond='data:blog.pageType != &quot;static_page&quot;'>
<ul class='mbt-pager'>
        <li class='next'>
<b:if cond='data:newerPageUrl'>
<i class='fa fa-chevron-right'/><a class='newer-link' expr:href='data:newerPageUrl' expr:id='data:widget.instanceId + &quot;_blog-pager-newer-link&quot;' rel='next'/>
<b:else/>
<i class='fa fa-chevron-right'/><a rel='next'><strong>Next</strong> <span>You are viewing Most Recent Post</span></a>
</b:if>
</li>
    <li class='previous'>
<b:if cond='data:olderPageUrl'>
<i class='fa fa-chevron-left'/><a class='older-link' expr:href='data:olderPageUrl' expr:id='data:widget.instanceId + &quot;_blog-pager-older-link&quot;' rel='previous'/>
<b:else/>
<i class='fa fa-chevron-left'/><a rel='previous'><strong>Previous</strong> <span>You are viewing Last Post</span></a>
</b:if>
</li>
    </ul>

<script type='text/javascript'>
//<![CDATA[
(function($){   
    var newerLink = $('a.newer-link');
    var olderLink = $('a.older-link');
    $.get(newerLink.attr('href'), function (data) {
     newerLink.html('<strong>Next</strong> <span>'+$(data).find('.post h3.post-title').text()+'</span>');   
    },"html");
    $.get(olderLink.attr('href'), function (data2) {
     olderLink.html('<strong>Previous</strong> <span>'+$(data2).find('.post h3.post-title').text()+'</span>');   
    },"html");
})(jQuery);
//]]>
</script>
      </b:if></b:if>
8. Save your template and you are almost done! Visit your blogs and you will see the pager navigation working just perfectly! :)

Removing existing Next/Previous buttons

Now its time to prevent the default buttons from displaying below comment sections.
  1. Search for  <b:includable id='nextprev'>  
  2. You will see a big chunk of code below it that looks slightly similar to the code below:
<div class='blog-pager' id='blog-pager'>
   <b:if cond='data:newerPageUrl'>
     <span id='blog-pager-newer-link'>
     <a class='blog-pager-newer-link' expr:href='data:newerPageUrl' expr:id='data:widget.instanceId + &quot;_blog-pager-newer-link&quot;' expr:title='data:newerPageTitle'><data:newerPageTitle/></a>
     </span>
   </b:if>
   <b:if cond='data:olderPageUrl'>
     <span id='blog-pager-older-link'>
     <a class='blog-pager-older-link' expr:href='data:olderPageUrl' expr:id='data:widget.instanceId + &quot;_blog-pager-older-link&quot;' expr:title='data:olderPageTitle'><data:olderPageTitle/></a>
     </span>
   </b:if>
   <a class='home-link' expr:href='data:blog.homepageUrl'><data:homeMsg/></a>
   <b:if cond='data:mobileLinkUrl'>
     <div class='blog-mobile-link'>
       <a expr:href='data:mobileLinkUrl'><data:mobileLinkMsg/></a>
     </div>
   </b:if>
</div>
<div class='clear'/>
  3. All that you need to do is to enclose this code inside conditional codes as shown below:
<b:if cond='data:blog.pageType != &quot;item&quot;'>
<b:if cond='data:blog.pageType != &quot;static_page&quot;'>

THE ABOVE BIG CHUNK CODE IN
</b:if></b:if>
   4. Save your template and you are all done! This widget was from mybloggertricks.com.

If you face any problem installing the widget feel free to let me know using the comment below


Continue reading →

Unique Style Social & RSS Subscription Widget For Blogger

0 comments
social media widget
In today's tutorial i will be giving you unique style social and RSS subscription widget for your blog.This tutorial in meant for both blogger and wordpress user.So happy right? lets go to the tutorials now

Install Unique Subscription widget on Blogger?

Follow given steps to install this widget on blogger blogs: 
  • Go to Blogger Dashboard
  • Layout >> Add a Gadget >> Select HTML/JavaScript Gadget
  • Now copy below code and paste inside HTML/JavaScript Gadget
<!--Subscribe Follow Gadget starts-->
<center><a title="Grab Our Rss Feed" href="http://feeds.feedburner.com/noblenaijablog" target="_blank"><img border="0" src="https://blogger.googleusercontent.com/img/b/R29vZ2xl/AVvXsEhiNBY0XNSEdJjo1bno1nx2VPxfOAtZRnJ1CwhnxxQlFc8e7XEMNOx0VF88Q4BldPw9t7wcMYugRt_cQnV32AyFy5SMWVsJ5UCBHy82B5fifEbdyQ6EnzprDM9xnih7Of762i1DVvfcYMMy/s1600/RSS_78x75.png" style="margin-right:2px;" alt="Icon"/></a><a rel="nofollow" title="Get Free Updates Via Email" href="http://feedburner.google.com/fb/a/mailverify?uri=NOblenaijablog&amp;loc=en_US" target="_blank"><img border="0" src="https://blogger.googleusercontent.com/img/b/R29vZ2xl/AVvXsEjAGWF24UbRWY4sDA9xb10NX19vkpwMtvvBKO6IzwN-HywjGYgqaaj9ulhcOV9Nf3R5K8goN-lSSNBAYQRND0F-z_CWBbwqYlS3afHEqZ4lU3JlgHFRV8FsXOI-QXEaSYfs0XMbGxx1jMX8/s1600/Email_78x75.png" style="margin-right:2px;" alt="Icon"/></a><a rel="nofollow" title="Like Our Facebook Page" href="http://facebook.com/young bill 718" target="_blank"><img border="0" src="https://blogger.googleusercontent.com/img/b/R29vZ2xl/AVvXsEhf2NLwzjSp2SPe5NVTFOt4MZKBTVgXjh3KHzeey7Q6jw0UdChlkUvFY8i63Bf3KO1nYrcLGDvhUh45xVIV7-o4L_TLF8COXWQQQhZffJF1J9GzB9NsD_7VGUbT1BnunXsvFqE9rg8Yu8R4/s1600/Facebook_78x75.png" style="margin-right:2px;" alt="Icon"/></a><a rel="nofollow" title="Follow Our Updates On Twitter" href="http://twitter.com/oyejobiA" target="_blank"><img border="0" src="https://blogger.googleusercontent.com/img/b/R29vZ2xl/AVvXsEi7MmD3__7NyGC0_DUSDk3RwOHFvQfjOV2y1fR9YfiAg2YWaDWmRP9AYwLkApIygLDlcBBxetoynxSCE1Lcw60YYoTOUVcdCnJddsFTPMvDMH4Y1PuZx1BhAUJzRpuQO9lkJxTmuphMfYJE/s1600/Twitter_78x75.png" style="margin-right:2px;" alt="Icon"/></a><a title="Follow Us On Google+" rel="nofollow" href="https://plus.google.com/108628318516871549001" target="_blank"><img style="margin-right:2px;" src="https://blogger.googleusercontent.com/img/b/R29vZ2xl/AVvXsEhQ3WtJEYJtjq9PcdD4VJrgu9tKPhxQZv2OXOngNmSkCFRthMtqiW90yZuO_Kfd3Cph6KFeLEyW_TxLX-kbdt5JI5LnlOqkekdju3VKjP8jpiiEb7KEMZjI7ey4wZbJUwLNHwAPtShcYg4V/s1600/Google+_78x75.png"/></a><a title="Follow Our Pins" rel="nofollow" href="http://pinterest.com/oyejobia/" target="_blank"><img style="margin-right:2px;" src="https://blogger.googleusercontent.com/img/b/R29vZ2xl/AVvXsEjlUmmMEn9IjC1fkmnOToN0AuRi9Y5QLDA52fLy31ovzrKcLVD45uNCQnMTT_-lyRB2Zf8EpgTXraZ3TnHN5cSh3eKoGXzmI0O42qJHzIu6bjS5I4g26aL5SyHusUjBUJbKrXqlXpjKLXIL/s1600/Pinterest_78x75.png" alt="Follow Me on Pinterest" /></a></center>
<!--Subscribe Follow Gadget Ends-->
4. Save you the widget and view your blog to see a very unique and stylish social subscription widget along with RSS subscription button.

How to Install This widget on WordPress? 

Installing this widget on WordPress blogs is also very easy, and shouldn't take more than 5 minutes, follow these steps to install this widget on WordPress do following: 
  • Go to WP Dashboard
  • Appearance >> Widgets
  • Select a Text Widget 
  • And Paste the above provided code inside text widget
  • Save the widget and view your blog 

Customization: 
What you need to customize in this widget is; just replace the Blue Highlighted links with your own links, because these all are my social profiles links, so you can easily replace them with yours.


Continue reading →

How to Install Disqus Commenting System on Blogger?

0 comments
Many bloggers dont like existing comment but when blogger development team introduced the threaded commenting system for blogger, that was an awesome addition to blogger's features and was welcomed by every user of Google's platform.Today  will be giving you the important of installing disqus to your blog and the advantages.

Advantages of Disqus
Before going to install disqus to your blog do you mind if i can give the advantages? I got you, these are the advantages below;
  • Multiple replies to a single comment
  • Anyone Can comment with a temporary name
  • Discussions can be shared on social media networks
  • Commentators have the power to change their settings
  • Commentators can rate the comments
  • Disqus counts top commentators 
  • Many more
How to Install Disqus
've taken the screen shoots of every step you'll be going through while installing Disqus on Blogger, and this shouldn't take you more than 10 minutes to install the Disqus commenting on blogger platform.   
Now click the Continue link at the bottom and you'll be redirected to another page as showing in below picture: 
installing disqus on blogger
Here you need to click on "Blogger" icon as you are going to install Disqus on Blogger. So just click the blogger icon and you'll be on a page like this image: 
Now at above point, you need to click the Add Your Blogger Site link which will automatically take you to blogger interface from where you can just add the Disqus commenting system in a separate Gadget, and this gadget will replace your older blogger commenting system. After adding this gadget just check one of your existing posts and see the new installed Disqus commenting system.
However, this Disqus installation will only show new comments, but if you want to embed your older blogger comments to Disqus commenting system then you must first embedd them to Disqus database. For that purpose you can use the #2 option which is saying "Import your existing blogger comments into Disqus at Tools > import." as showing in below screen shoot: 
When you clicked the link "Tools > Import" then a new page will be showing up like this one: 
There are two options for you to import your existing comments into Disqus database, the first option is "One-Time import" and the second option is "Sync New Comments" which will keep comments synced with Blogger, so you need to use Enable syncing, because you can later on re-install your blogger commenting system over Disqus, therefore it is good to have both the options available to you. 
That's all done and have great fun with Disqus commenting system on your blogger blog.
Continue reading →
Blogger Widgets
 

Contact Form

Name

Email *

Message *

Jquery Dropdown Menu

Author's Bio

Founder & Author: Oyejobi Adeola is a blog designer, web developer and a loving person currently working on several web projects, he is managing several blogs from his living.He loves to help and teaches different people on how they can make it big online without age barrier.Do you really love his blog? If yes, then
Read More About Him

Recipes

Related Posts Plugin for WordPress, Blogger...
Copyright © 2013 Noblenaijablog All Right Reserved
Designed by oyejobiA | Powered by Blogger