Latest: Tutorials


Tuesday 25 February 2014

How to add Wikipedia Search Box Widget in Blogger

0 comments
My today"s post is how to add a wikipedia search button on blogger.

If you have some kind of knowledge about HTML,CSS then you can do much better with blogger as well.Yesterday,blogger introduced a new widget i.e “Wikipedia Search Box widget” to the list of their Gadget.It is developed by Blogger team so you won’t see any kind of Bugs while using it.The details about its working is shown below.

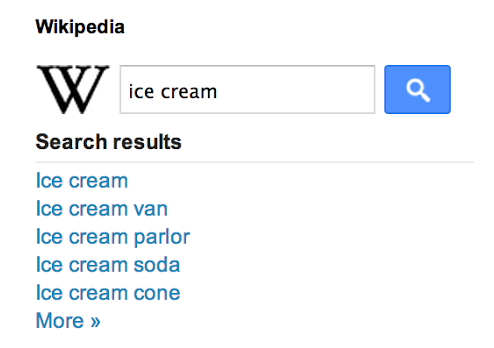
How does Wikipedia Works in blogger
You might wondering, how does this works and what effects does it has on your blog, it is simple, wikipedia is a seach engine like google. When you google about something, it gaves you related searches and when clicked on redirect you to Wikipedia.
HOW DOES THE WIKIPEDIA SEARCH BOX WORKS IN BLOGGER 


How to add Wikipedia Search Box Widget in Blogger


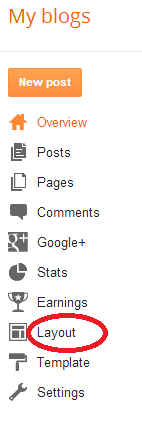
  • In order to add it into your blogger blog,log into your account and click on Layout.The screenshot of the same is shown below:
111 How to disable text selection in blogger and wordpress blog?
  • After that Click on “Add a Gadget“.The screenshot of the same is shown below.
BloggerEditLayout How to disable text selection in blogger and wordpress blog?

Now you will see a Pop up with many Gadgets.Click on “More Gadgets” option on the left hand side and choose the “Wikipedia New!“.Find Wikipedia New and add it to your blog.

If you have any problem doing this, let me know using the comment box below

 
Continue reading →

How to Add a funny robotic Chat client in your Blog?

0 comments
How to Add a funny robotic Chat client in your Blog?
oh are you surprised, a friend of mine taught me this, that why am sharing it to my reader.

How to Add a funny robotic Chat client in your Blog?

This tool does not matter whether you are a blogger or wordpress user, it works in both and even website.If you already know about siri then it is just like that.It will answer your questions so you would be able to chat with it.However remember that it is a robotic conversation so it has few limitations.

To add your Funny Robotic Chat client in your blog,simply add the below code in html editor mode.

<iframe name=”cleverbot” src=”http://www.cleverbot.com/cleverbotif” height=”300″ width=”100%” frameborder=”0″ scrolling=”no”></iframe>

If you are not satisfy with the height and width, then you can make a change to your desired dimension  

Continue reading →

How to Remove "Powered by Blogger" Attribution widget In Blogger?

0 comments


The attribution gadget is a gadget present at footer of blog and says "Powered by Blogger"The widget is locked, when you click on the edit link of attribution widget you will warning that there is no Remove link, because the widget is locked officially by the blogger. To unlock the gadget follow my easy steps below carefully.

How to Remove "Powered by Blogger" Attribution widget In Blogger?

  • Go to Blogger Dashboard > template > Edit HTML
  • As always download a copy of your template
  • Now Find the code shown below using [ctrl+F] in your template.
<b:widget id='Attribution1' locked='true'title='' type='Attribution'>

Replace
locked='true' with locked='false'
  • Now save your template and go to Layout page.
  • Click on the edit link of attribution widget.
  • Click Remove button and you are done.

If you have any problem doing this, then let me know using the comment box below


Continue reading →

How to add Paypal Donate button in WordPress and Blogger Blogs?

0 comments
My today's post will be based on how to add a paypal donate button in Wordpress and Blogger blogs?Though it helps adding this wonderful tool to blogs which am sure 10% of your visitors will surely be an handing help to you.

How to add Paypal Donate button in WordPress and Blogger Blogs?
PayPal Donate Button in WordPress 
I will be giving you two steps in adding a paypal donate button to your blog;


  1. Generation of HTML codes for PayPal Donate Button .
  2. Using the Generated HTML Code


  1. Generation of HTML codes for PayPal Donate Button .

  • Without Signing in to your PayPal Account- Click Here 
  • Click on “Create Your Button Now” Link. The screenshot for the same is shown below:
PayPal Donate Button in wordPress
  • After clicking on “Create Your Button Now” link as shown in above figure, you will be redirected to a new window. In Choose a button type drop down list, Choose “Donations” . For understanding it better, see the below given figure:
PayPal Donate Button
  • Fill all fields carefully. In Organization Name/ Service field, you can use any name. If you are a part of organization, use the same. As far as Donation ID field is concerned, you can leave it blank.
  • Scroll down the Page and choose whether you want a fix donation from users or want them to decide the amount, they want to donate.
  • You can also customize the look of your Donate Button by clicking on “Customize text or Appearance” link.
  • Once done, fill your PayPal Email Address and click on “Create Button“. Everything is clearly explained in the below given figure:
PayPal Donate Button

  • After clicking on “Create Button“, you will get HTML code for PayPal Donate Button. Just copy it because we will use the same code in WordPress and Blogger.
Paypal Donate Button

  • That’s it. We have got the code. Now, we will use the same in WordPress and Blogger.

2. How to add PayPal Donate Button in WordPress Blog?

  • Log into the Admin Dashboard of your WordPress Blog by visiting http://www.yourblog.com/wp-admin
  • In Dashboard, Navigate to Appearance>>Widgets. The screenshot for the same is shown below:
Widgets in wordPress
  • After clicking on “Widgets”, as shown in above figure, you will be redirected to the widgets page where you will see lots of Widgets. Choose “Text Widget“. For understanding it better, see the below given image:
Text Widget in WordPress
  • Now, Enter the Title of the widget and  Paste the HTML code of PayPal Donate Button , which was generated by you in the above shown step. The screenshot for the same is shown below:
Text Widget in WordPress

  • In the above shown figure, I have named the widget “Donate us“. Once done, click on “Save” button and enjoy.

2.How to add PayPal donate button in Blogger Blogs?

  • Log in to your Blogger Profile by visiting http://blogger.com
  • In Dashboard, Click on “Layout” option. You will find this option on the left hand side. Below given figure shows the same:
Layout Option in Blogger
  • Click on “Add gadget” option in your Blog’s Layout.The screenshot for the same is shown below:
Add a Gadget Option in Blogger
  • Now you will see a Pop-up box. Just scroll down until you find “ html/Javascript” option.If found click on it. The screenshot of the same is shown below.
HTML/Javascript option in blogger
  • Paste the HTML code of PayPal Donate button which was generated by you in step 1.  You can add a Title for your widget as well. I have added “Donate Us”. Below given figure shows the same:
PayPal Donate Us button

  • Once done, click on “Save” Button and enjoy.

If you have any query using these steps then let me know using the comment box below
Continue reading →
Blogger Widgets
 

Contact Form

Name

Email *

Message *

Jquery Dropdown Menu

Author's Bio

Founder & Author: Oyejobi Adeola is a blog designer, web developer and a loving person currently working on several web projects, he is managing several blogs from his living.He loves to help and teaches different people on how they can make it big online without age barrier.Do you really love his blog? If yes, then
Read More About Him

Recipes

Related Posts Plugin for WordPress, Blogger...
Copyright © 2013 Noblenaijablog All Right Reserved
Designed by oyejobiA | Powered by Blogger